April 2010Step 1:
Get distracted by 8 thousand roly polys on the way to the mailbox. Making what should have been an under 5 minute trip take closer to 20.
Step 2:
Decide to go back home and get bug catchers so we are not setting up permanent camp in front of neighbors we don't really know. For some reason the roly pollys are most plentiful across the street.
Step 3:
Remove the plethora of balls currently stored in both bug catchers.

Step 4:
Head back out and yell explanations about what we are doing to anyone who happens to walk by. (We have really got to work on stranger danger...)
CB to old man who just wants to go in his house and sit in his recliner, "We're looking for roly polys. They are coming back to our house just for a little while and then they will go back to nature."
BBD to the teeny boppers who rode by on their too-small-for-them-but-maybe-I-am getting-old-and-don't-realize-that-it-it-now-cool-to-ride-tiny bikes, "We're catching bugs! Catching bugs!"

Step 5:
Open your bug catchers, place them in the roly poly's path, and invite him to come on in.

Step 6:
Become annoyed and frustrated when this does not get the desired result.

Step 7:
Offer different enticing items for the roly polys to climb onto so that 1) Mom does not have too actually touch the slightly creepy crustaceans and 2) BBD does not squish them despite their armor because I think he could do it, I really do.


Turns out the leaves worked best. I was informed by CB, a self proclaimed scientist, that they do not like sticks because they make them choke.
Step 8:
Do not be fooled by imitations.

Step 9:
Collect nature items to make them feel more at home.

Note-this does make it difficult to see the roly polys.

Step 10:
Take a break.
If you are like CB this means asks for a snack. "Sometimes you ask for raisins and that gets you raisins and that makes you happy."
If you are more like BBD this means you become distracted by a very long stick.

This stick was very versatile. It was an umbrella, an airplane, and a helicopter. It was also good for just shaking around.
Step 11:
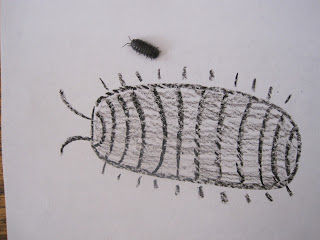
Take them inside because it is getting chilly outside and Mom has this great idea to observe them and draw pictures of them.
Step 12:
Ask questions and make observations and plans for them.
CB
"Do they like raisins?"
"Here is a warm blanket for them to sleep on."
(Lays out a tissue for them.) "Maybe they will come out if they smell some raisins."
"He's trying to close his shell."
"Do roly polys like to climb?"
BBD
"Come out."
"He's funny!"
Step 13:
Watch Mom draw a picture, but do not make one yourself.

BBD told me, "He likes his picture."
CB thought it would be more fun to color pictures of butterflies and BBD decided to liberate all of the roly poly bugs instead of just the one Mom got out to observe closer.
Step 14:
Release the roly polys back into the wild much sooner than originally planned because clearly BBD cannot be trusted to keep them contained.
(Mom reflects that she should have seen that coming.) Step 15:
Do a little research online about roly polys since our observation period was cut short. Mom shares with CB that they eat decomposing material and they need to be where it is wet because they breathe with things like a fish's gills.
CB mulls this new info over, "Should we give them some mud?"
And with that our roly poly wrangling is officially over.
At least for today.


